24 May
Photo Processing: The Jenna Cole Recipe
I get lots of questions about processing (which I actually find very flattering, I’m always working to not only shoot better, but edit better as well) and so I thought a series of posts on different processing techniques I’ve discovered would be appreciated by some of you. I think it’s important to keep in mind that good photos are created in camera, and enhanced with processing. I don’t think it’s possible to make it happen the other way around. ![]()
Over time I’ve come up with a standard set of actions that I run on every photo. It seems to work well with the way I shoot and although I’m still working to figure out the perfect processing technique to use on every photo. My ultimate goal is to be like Jonas Peterson. He shoots in a very consistent way and just runs all of his images through Photoshop with a batch action, editing only a select few individually. He can process a wedding in less than half the time I can!
I like using actions, and almost all of those I use are modified versions of Totally Rad Actions, although I do use a few of Pioneer Woman’s every once in awhile. Here’s a good tip: PW’s second set of actions were created in collaboration with Doug Boutwell, the guy behind Totally Rad Actions, and a few of those from the TRA set have PW actions that are somewhat similar. For example, TRA Oh Snap! is almost the same as PW Boost.
Here is the original image. It was shot with my 5dmkii using a 50 1.2 lens. ISO 640, f 2.2, 1/125.

I do all of my culling in Lightroom, and that’s where I apply what I call “Basic Edits”. When I edit in Lightroom I tend to bump the Exposure, Blacks, Brightness, Contrast, Clarity, adjust the White Balance, -10 red and orange Saturation, and +10 red and orange on Luminance.

I export the images into Photoshop and run what I’ve come to call the “Jenna Cole Recipe”. All three actions I use for this are made by Totally Rad Actions. I’ve found that the recipe only works this way when I do it in this exact order.
Run Claire-ify first, and set the opacity to 10%. Select the “background” layer from the layers palette.
Run Oh Snap! and set the opacity to 10%. Select the “background” layer from the layers palette.
Run f/zero. Deselect the Out of focus layer. Set the In Focus layer to 28%.
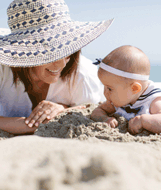
The Fine Art Edit below is what I got when I ran this recipe.

Here are a few comparisons to help you see the difference my edits made.


Now you know how to make images that look like mine if you so please!


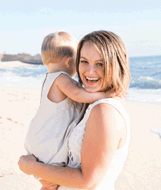 I'm a farm-raised almost-crunchy stroller-pushing picture-taking lifestyle-blog-writing gastronomy-obsessed divine-seeking thrift-store-combing cheese-inhaling pavement-pounding laughter-sprinkling lover of individuality and taking chances.



Awesome, Jenna! I find it so fascinating to look at other peoples’ workflow.
My goal is to get to the point where I can batch edit, too. Jonas doesn’t shoot in my ‘style’ but I idolise him a little bit regardless. Beautiful work and such amazing workflow!
It is amazing the difference between the RAW and the fine art edit. Love it!
Just wondering - have you made your own presets in LR? I have started doing this and it is AWESOME if a little time consuming.
1Thank you for sharing this. I have such a hard time understanding the “processing” process. In this case, I don’t see why you would make any changes to the original - but I love seeing the side by side comparisons anyway. Do you retouch all of your photos or do you have a system for deciding when to do the edits?
Jenna Reply:
May 24th, 2010 at 11:57 am
Editing is so much about personal preference. It’s likely that I ‘ll look back on these in a year and hate them, but I like them now so I go with it.
I only Fine Art Edit those that I’m putting online or ordering prints of. Everything else is just a Basic Edit which goes really fast with Lightroom.
That Wife photos are almost always Basic Edits though, as I don’t have the time to Photoshop everything.
Wow. Awesome editing. I was actually JUST about to submit a question to your formspring asking about how you post-process your photos. They always look fantastic. You really have an eye for photography!
3This is really fantastic. I love seeing the before-and-afters - it really helps me in my own fumbling-bird photography efforts. Thanks!
4I usually love your photography - you are definitely talented, but for some reason your final picture looks a little washed out in the woman’s face and her shirt compared to the original. I guess maybe the white balance is off?
Kelli Nicole Reply:
May 25th, 2010 at 7:38 am
One reason for this is that everyone’s monitors are different! I’ve found that most uncalibrated monitors make things appear more washed out that usual.
J-Dub Reply:
May 25th, 2010 at 9:32 am
I hadn’t though of that, but you’re probably right. Thanks! I’ve never had that problem before, but I can definitely check it and fix it.